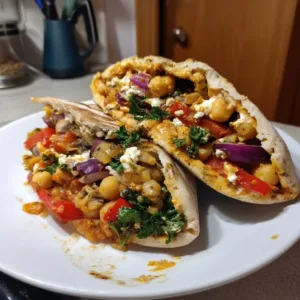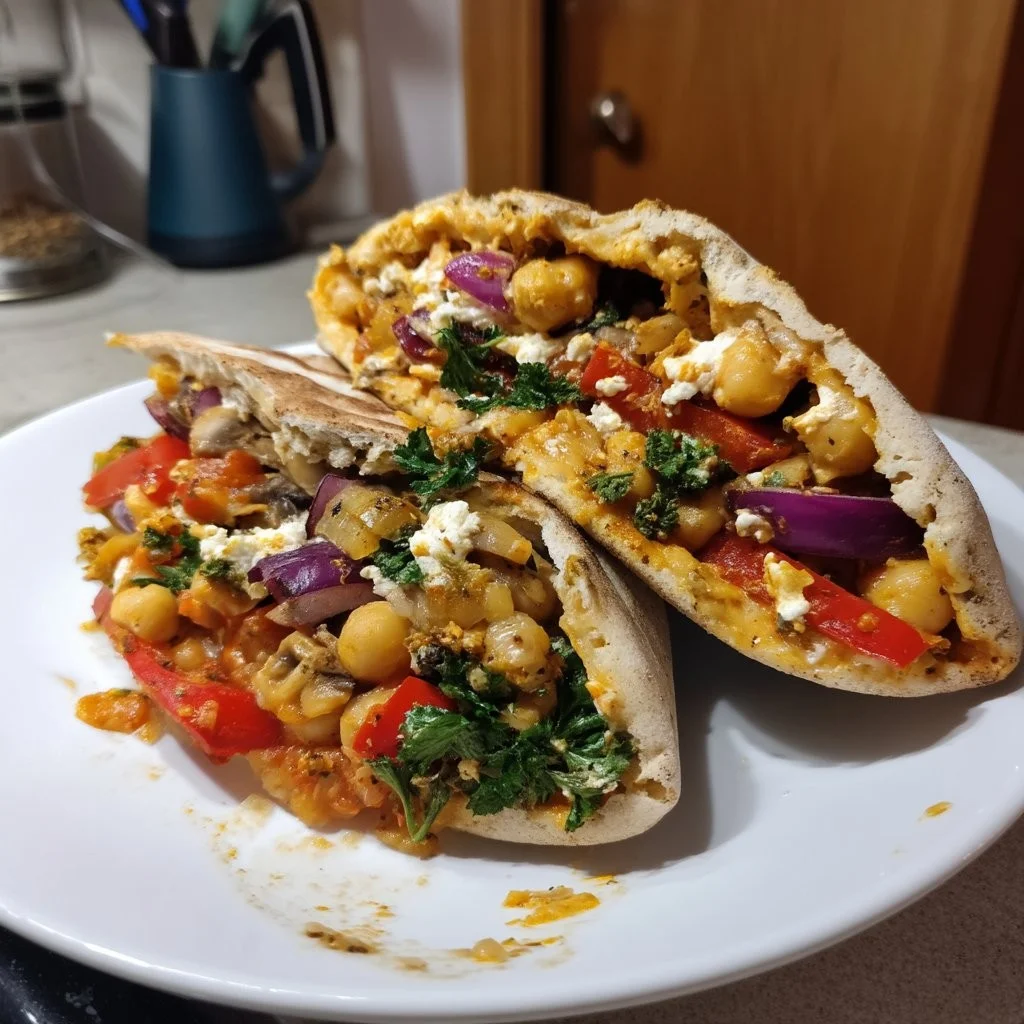
When you marinate chickpeas and grill them on skewers, then stuff them in warm pita with fresh vegetables and sauce, you get something you can grab and go. The grill gives them char and flavor. I make these when I need lunch that’s ready and doesn’t need reheating. 15 minutes total. Pack them for work. Best eaten fresh, same day. This works and tastes better than takeout.
Why This Works
Thread chickpeas on skewers so they cook evenly and don’t fall through the grill grates. Don’t overcrowd; give them space for heat to caramelize. Char them on all sides for depth of flavor. Warm the pita so it’s pliable and won’t crack when you stuff it. Layer vegetables so nothing falls out when you bite. Use enough sauce to bind everything, but not so much that it gets soggy. Eat fresh, same day; texture softens if it sits overnight.
Ingredients
- 2 tbsp avocado oil, divided
- 1 (15 oz) can chickpeas, rinsed and drained
- 1/2 yellow onion, finely diced
- 1 red bell pepper, finely diced
- 4 oz of mushrooms, finely diced
- 5 cloves garlic, minced or crushed
- 1 tbsp tomato paste
- 1/2 tbsp soy sauce or coconut aminos
- 2 tsp za’atar
- 1/2 tsp ground cumin
- 1/2 tsp ground coriander
- 1/4 tsp fennel seeds
- 1/4 cup parsley, minced
- Salt and pepper to taste
- 3 whole grain pitas
- 1/2 cup plain, unsweetened vegan Greek-style yogurt or your favorite thick vegan yogurt
- Juice of half a lemon
- 1 clove garlic, crushed or finely grated
- 1/4 cup cilantro, finely minced
- 2 tsp extra virgin olive oil, optional
This blend of ingredients comes together to create a satisfying meal, suitable for a variety of dietary preferences.
How To Make It
- Place your chickpeas in a bowl and roughly mash them with a fork to crumble them, then set them aside.
- In a sauté pan over medium heat, heat up a tablespoon of avocado oil, then add the diced onion, bell pepper, and mushrooms. Sauté for 2-3 minutes, allowing the mixture to release some of its moisture.
- Add a pinch of salt and cook until most of the liquid has evaporated. Add the minced garlic and sauté until fragrant, about 30 seconds.
- Stir in the tomato paste, mashed chickpeas, soy sauce, za’atar, cumin, coriander, and fennel seeds, then sauté for an additional 2-3 minutes.
- Mix in the parsley and taste the filling, adjusting the seasoning as necessary. Once done, set it aside.
- Preheat a griddle and slice each pita in half, opening the pockets. Carefully stuff each pita half with the chickpea filling, taking care not to overfill.
- Brush or spray the filled pitas with the remaining avocado oil.
- Place each pita, filling side down, on the grill for about 3-4 minutes, until grill marks appear. Flip the pitas and sear for an additional 3 minutes on the other side.
- To make the yogurt sauce, combine the yogurt, lemon juice, crushed garlic, and cilantro in a bowl, whisking to combine. Season with salt and pepper to taste.
- Serve the grilled pitas with the yogurt sauce and any fresh veggies you choose.
These steps will help you create delicious, grilled pitas that are sure to impress.
Quick Substitutions
- Chickpeas → Canned beans: Any canned bean can work, but adjust cooking time since softer beans cook quickly.
- Avocado oil → Olive oil: This will give a slightly different flavor but will still heat well for sautéing.
- Tomato paste → Tomato sauce: This will make the filling slightly more liquid, so reduce the sauté time to prevent excess moisture.
- Za’atar → Italian seasoning: While not as complex, it will add a different aromatic dimension.
- Whole grain pitas → Tortillas: For a softer texture, use tortillas instead of pitas, but they won’t hold the shape as well.
These substitutions allow for flexibility while maintaining the essence of the dish.
Tips Before You Start
Begin by ensuring all vegetables are chopped and ready to go; this makes the cooking process smoother. If the chickpeas are not mashed enough, the filling may lack cohesion, so aim for a rough yet crumbly texture. One common issue is over-sautéing the vegetables, which can lead to mushiness; watch them closely to keep some crunch. In my experience, swapping in a bit of lemon zest along with the juice brightens the overall flavor. Using different herbs or spices can also refresh the dish for variety in your rotation.
Common Mistakes to Avoid
- Overcrowding the Pan: Filling the pan too much prevents proper sautéing. Cook in batches if necessary to allow for proper moisture evaporation.
- Under-seasoning: Not seasoning the chickpea filling adequately leads to a bland outcome. Taste and adjust the seasoning multiple times, especially after mixing in herbs.
- Skipping the Yogurt Sauce: It adds a creaminess that balances the dish. Don’t skip it or substitute it entirely for something dry.
By avoiding these pitfalls, you can ensure a better result.
Nutrition At A Glance
- Serving Size: 1 stuffed pita
- Calories: Approximately 420
- Protein: 15g
- Carbohydrates: 60g
- Fat: 15g
- Fiber: 10g
This nutritional breakdown highlights the dish’s balance of macronutrients.
Serving Ideas
- Fresh salad: A simple green salad with vinaigrette complements the warm pitas nicely, adding freshness.
- Chips and dip: Pairing with homemade hummus or tzatziki can elevate the meal further.
- Grilled veggies: Serve alongside grilled seasonal vegetables for a varied platter of textures.
Each of these accompaniments would enhance your meal experience.
Storage and Reheating
- In the fridge: Store in an airtight container for up to 3 days.
- In the freezer: You can freeze the filling separately for up to a month; thaw overnight in the fridge before reheating.
- Reheat in the microwave for 1-2 minutes or on a skillet over medium heat with a splash of water until warmed through. Expect the pitas to become softer overnight but still enjoyable.
Fresh ingredients do make a difference in taste even a day later.
Leftover Ideas
Transform leftovers by:
- Mixing the chickpea filling into salads for added protein.
- Spreading on toast for a quick snack topped with avocado slices.
- Using as a filling for omelets to create a protein-packed breakfast.
These ideas utilize the main ingredient effectively while providing variety.
Conclusion
You now understand the importance of texture in the Grilled Chickpea Veggie Pita, especially with the mashed chickpeas functioning as a binder. Next time, consider adding some roasted red peppers or spicy jalapeños for a unique twist that introduces more depth. Making this dish soon not only satisfies hunger but encourages healthy eating habits effortlessly.
For another way to enjoy chickpeas, try our grilled chicken salad with chickpeas.
Print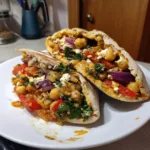
Grilled Chickpea Veggie Pita
- Total Time: 25 minutes
- Yield: 3 servings 1x
- Diet: Vegan
Description
Marinated chickpeas grilled on skewers and stuffed in warm pita with fresh vegetables and sauce, perfect for a grab-and-go lunch.
Ingredients
- 2 tbsp avocado oil, divided
- 1 (15 oz) can chickpeas, rinsed and drained
- 1/2 yellow onion, finely diced
- 1 red bell pepper, finely diced
- 4 oz mushrooms, finely diced
- 5 cloves garlic, minced
- 1 tbsp tomato paste
- 1/2 tbsp soy sauce or coconut aminos
- 2 tsp za’atar
- 1/2 tsp ground cumin
- 1/2 tsp ground coriander
- 1/4 tsp fennel seeds
- 1/4 cup parsley, minced
- Salt and pepper to taste
- 3 whole grain pitas
- 1/2 cup plain, unsweetened vegan Greek-style yogurt
- Juice of half a lemon
- 1 clove garlic, crushed
- 1/4 cup cilantro, finely minced
- 2 tsp extra virgin olive oil, optional
Instructions
- Place your chickpeas in a bowl and roughly mash them with a fork to crumble them, then set them aside.
- In a sauté pan over medium heat, heat up a tablespoon of avocado oil, then add the diced onion, bell pepper, and mushrooms. Sauté for 2-3 minutes.
- Add a pinch of salt and cook until most of the liquid has evaporated. Add the minced garlic and sauté until fragrant, about 30 seconds.
- Stir in the tomato paste, mashed chickpeas, soy sauce, za’atar, cumin, coriander, and fennel seeds, then sauté for an additional 2-3 minutes.
- Mix in the parsley and taste the filling, adjusting the seasoning as necessary. Once done, set it aside.
- Preheat a griddle and slice each pita in half, opening the pockets. Carefully stuff each pita half with the chickpea filling.
- Brush or spray the filled pitas with the remaining avocado oil.
- Place each pita, filling side down, on the grill for about 3-4 minutes. Flip the pitas for an additional 3 minutes on the other side.
- To make the yogurt sauce, combine the yogurt, lemon juice, crushed garlic, and cilantro. Whisk to combine, seasoning with salt and pepper to taste.
- Serve the grilled pitas with the yogurt sauce and any fresh veggies you choose.
Notes
Best eaten fresh, same day. Avoid overcrowding in the pan and ensure proper seasoning for the best flavor.
- Prep Time: 10 minutes
- Cook Time: 15 minutes
- Category: Main Course
- Method: Grilling
- Cuisine: Mediterranean
Nutrition
- Serving Size: 1 stuffed pita
- Calories: 420
- Sugar: 5g
- Sodium: 300mg
- Fat: 15g
- Saturated Fat: 2g
- Unsaturated Fat: 10g
- Trans Fat: 0g
- Carbohydrates: 60g
- Fiber: 10g
- Protein: 15g
- Cholesterol: 0mg