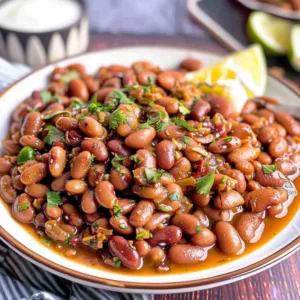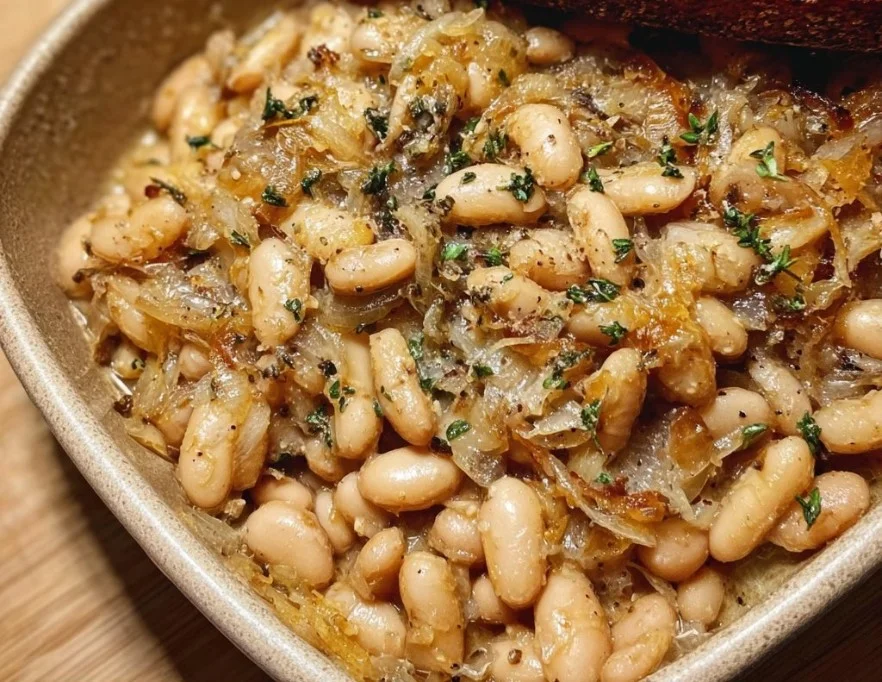
Caramelized Onion Cannellini Beans cook down pantry beans with slowly browned onions into a rich, savory base. As the onions soften and deepen in color, they lend the beans a smooth texture and subtle sweetness. It’s one I keep in regular rotation because it settles easily into dinner. If you enjoy recipes built on caramelized onions, you might also like my mujadara with caramelized onions.
Print
Caramelized Onion Cannellini Beans
- Total Time: 30 minutes
- Yield: 2 servings 1x
- Diet: Vegetarian
Description
A rich and savory dish of pantry beans cooked with slowly caramelized onions, bright balsamic vinegar, and fresh parsley.
Ingredients
- 1 can (15 oz) cannellini beans, drained and rinsed
- 2 large onions, thinly sliced
- 2 tablespoons olive oil
- 2 cloves garlic, minced
- 1 teaspoon thyme (fresh or dried)
- Salt and pepper to taste
- 1 tablespoon balsamic vinegar
- Fresh parsley for garnish (optional)
Instructions
- Heat the olive oil in a large skillet over medium heat, add the onions and cook, stirring occasionally, until they are caramelized, about 15-20 minutes.
- Add the minced garlic and thyme, cooking for an additional 2 minutes until fragrant.
- Stir in the cannellini beans and balsamic vinegar, and cook until the beans are warmed through, about 5 minutes.
- Season with salt and pepper to taste.
- Serve warm, garnished with fresh parsley if desired.
Notes
Brown onions slowly for the best sweetness. Use a wide skillet for even caramelization.
- Prep Time: 10 minutes
- Cook Time: 20 minutes
- Category: Side Dish
- Method: Stovetop
- Cuisine: Italian
Nutrition
- Serving Size: 1 serving
- Calories: 350
- Sugar: 3g
- Sodium: 600mg
- Fat: 10g
- Saturated Fat: 1g
- Unsaturated Fat: 9g
- Trans Fat: 0g
- Carbohydrates: 44g
- Fiber: 12g
- Protein: 18g
- Cholesterol: 0mg
Why This Is a Go-To in My Kitchen
This recipe works because the technique is simple, the payoff is big, and you can make it start to finish in about 30 minutes. Expect sweet, deeply browned onions folded through creamy cannellini beans, a touch of bright balsamic, and a finish of fresh parsley that keeps it lively. It’s forgiving, family-friendly, and scales easily, so whether I’m making a weeknight dinner for two or a shareable side for guests, it always lands.
What You’ll Need
- 1 can (15 oz) cannellini beans, drained and rinsed
- 2 large onions, thinly sliced
- 2 tablespoons olive oil
- 2 cloves garlic, minced
- 1 teaspoon thyme (fresh or dried)
- Salt and pepper to taste
- 1 tablespoon balsamic vinegar
- Fresh parsley for garnish (optional)
How It Comes Together
- Heat the olive oil in a large skillet over medium heat, add the onions and cook, stirring occasionally, until they are caramelized, about 15-20 minutes.
- Add the minced garlic and thyme, cooking for an additional 2 minutes until fragrant.
- Stir in the cannellini beans and balsamic vinegar, and cook until the beans are warmed through, about 5 minutes.
- Season with salt and pepper to taste.
- Serve warm, garnished with fresh parsley if desired.
How This Dish Fuels the Day
- Per serving (recipe makes about 2 generous servings): roughly 350 calories, 18 grams protein, 44 grams carbohydrates, 10 grams fat, 12 grams fiber, and about 600 milligrams sodium, these are estimates depending on your can of beans and how much oil you use, but the beans bring steady plant protein and fiber that keeps you satisfied.
When This Fits Best on the Table
- This is a late-afternoon, weeknight favorite, but it’s equally at home as a side for Sunday roasted chicken or a potluck contribution; serve it warm spooned over buttered toast, alongside roasted vegetables, or with a green salad and crusty bread to make a full meal.
Keeping It Fresh for Another Day
- Refrigerate leftovers in an airtight container for up to 4 days, reheat gently on the stovetop with a splash of water or broth to loosen the beans, and while freezing is possible for up to 3 months, the texture shifts slightly, so I usually freeze only if I plan to use it in soups or blended dishes later.
Small Details That Make a Big Difference
- Brown the onions slowly: patience here creates the deep sweetness that the whole dish depends on, so keep the heat moderate and stir occasionally rather than rushing with high heat.
- Use the right pan: a wide skillet gives more surface area for the onions to spread and brown evenly, preventing steaming.
- Rinse and warm the beans: rinsing reduces excess sodium and gently warming them before adding helps them absorb flavor without breaking.
- Finish with acid and herbs: the balsamic vinegar and parsley brighten the beans, so add them at the end to keep flavors fresh.
Simple Flavor Variations
- Seasonal: Stir in 1 cup of roasted autumn squash or diced roasted beets in late fall for an earthy, seasonal version that adds color and sweetness.
- Comfort-focused: Fold in a tablespoon of butter or a splash of cream and top with grated Parmesan to make it extra rich and spoonable.
- Slightly elevated: Toast pine nuts or slivered almonds and lemon zest to sprinkle on top for crunch and a citrus lift when serving to guests.
What Can Go Wrong and How to Fix It
- Onions not browning, just soft and pale: the pan is likely too crowded or the heat too low, so spread the onions in a wider pan, increase to medium heat, and be patient while stirring occasionally.
- Beans mushy or splitting: they’ve been stirred too vigorously or simmered too long, reduce cooking time and fold the beans in gently, warming them just long enough to take on flavor.
- Dish tastes flat or oily: you may need acid and salt, so add a splash more balsamic vinegar and a pinch of salt, then taste and adjust to balance the sweetness and oil.
- Too salty from canned beans: rinse the beans thoroughly under cold water before using, and offset salt by adding a squeeze of lemon or more balsamic vinegar.
Turning Leftovers Into Something New
- Mash and spread: mash the leftovers with a little olive oil and lemon juice to make a creamy bean spread for toast, sandwiches, or grilled pita.
- Fold into pasta: toss warmed leftover beans with hot pasta, a little reserved pasta water, and extra parsley for an easy weeknight pasta with protein.
- Add to soup: stir the beans into a tomato or vegetable soup near the end of cooking for added body and fiber, they’ll soften the broth and bulk up the meal.
Questions Readers Often Ask
Can I use dried cannellini beans instead of canned?
Yes, soaked and cooked dried beans work beautifully, and they give you control over sodium and texture, but plan ahead: soaked dried cannellini typically need 1 to 1 1/2 hours of simmering after an overnight soak, so use pre-cooked beans warmed gently in the skillet before adding seasonings.
How do I get deeply caramelized onions without burning them?
Cook slowly, steady heat is key, use a wide pan so onions aren’t crowded, and add a pinch of salt early to draw out moisture; if they begin to stick, lower the heat and stir, scraping up browned bits, that caramelization is flavor, not a problem to avoid.
Is this recipe suitable for meal prep and lunches?
Absolutely, it holds up well refrigerated for several days and works as a portable lunch over grains or toast; keep any bread or crunchy toppings separate until serving to preserve texture, and reheat gently with a splash of water if needed.
Can I add greens or vegetables directly to the skillet?
Yes, hearty greens like kale or chard can be stirred in near the end and cooked until just wilted, and small diced vegetables like bell pepper or zucchini can be sautéed with the onions early on, just watch timing so everything finishes tender but not overcooked.