I remember the evening I under-salted everything and saved this recipe by sheer texture alone, that crisp edge doing all the heavy lifting. These are Crispy Sliced Potatoes, simple, and exactly the kind of side I make when I want a reliable crowd-pleaser, not a culinary marathon. One subtle benefit, they reheat beautifully, and you’ll notice the warm, roasted potato aroma filling the kitchen while they crisp. This is a recipe I keep in regular rotation for weeknights and easy dinners.
Print
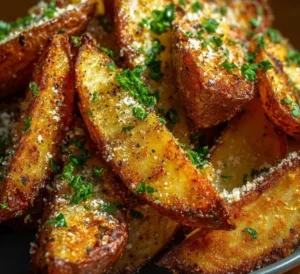
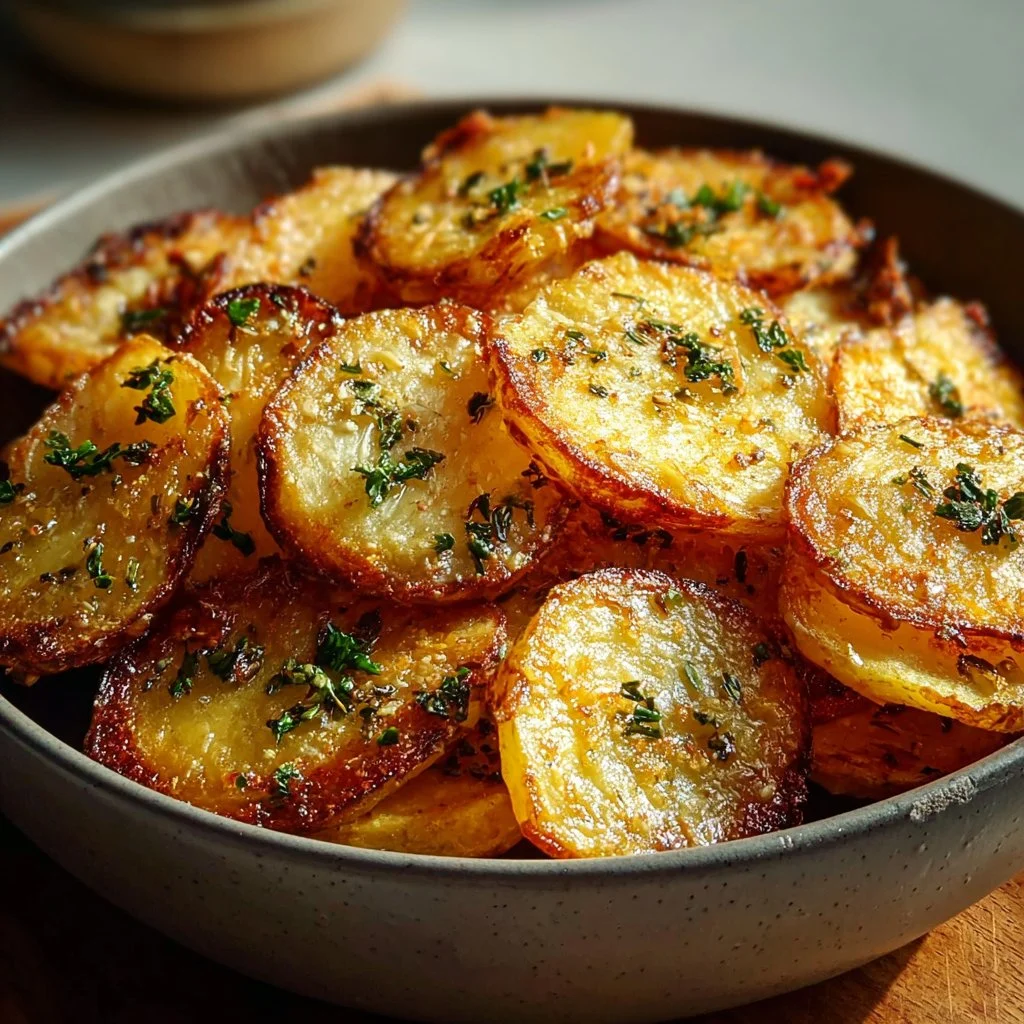
Crispy Sliced Potatoes
- Total Time: 40 minutes
- Yield: 4 servings 1x
- Diet: Vegetarian
Description
Delicious, reliably crisp potato slices baked to perfection without deep frying.
Ingredients
- 4 large potatoes
- 1 tablespoon olive oil
- 1 teaspoon garlic granules
- 1 teaspoon dried mixed herbs
- 1/2 teaspoon salt
Instructions
- Wash potatoes thoroughly and pat them completely dry.
- Slice potatoes to about 1/8th of an inch thick, aiming for uniformity.
- Transfer sliced potatoes to a large mixing bowl. Drizzle with olive oil, then sprinkle with garlic granules, dried mixed herbs, and salt.
- Gently toss the potato slices with your hands to ensure every piece is evenly coated with oil and seasonings.
- Preheat oven to 400°F (200°C). Line a large baking sheet with parchment paper and arrange the seasoned potato slices in a single layer, ensuring they do not overlap.
- Bake for 25-35 minutes, flipping the slices halfway through, until fork-tender and golden brown around the edges.
- Remove from oven and let cool on the baking sheet for a few minutes before serving to allow crispiness to set.
Notes
Store in an airtight container in the refrigerator for up to 3 days; re-crisp in the oven or air fryer before serving.
- Prep Time: 10 minutes
- Cook Time: 30 minutes
- Category: Side Dish
- Method: Baking
- Cuisine: American
Nutrition
- Serving Size: 1 cup (approximately 150 grams)
- Calories: 180
- Sugar: 1g
- Sodium: 300mg
- Fat: 5g
- Saturated Fat: 1g
- Unsaturated Fat: 4g
- Trans Fat: 0g
- Carbohydrates: 35g
- Fiber: 3g
- Protein: 3g
- Cholesterol: 0mg
How to Make Crispy Sliced Potatoes in 45 Minutes
If you want delicious, reliably crisp potato slices without deep frying, this method gets you there with minimal fuss. The goal is uniform slicing, dry surfaces, and just enough oil and seasoning to coax out golden, slightly blistered edges. Read through the method once, prep like a pro, and you’ll have a dependable side that pairs with everything from grilled chicken to weekday comfort bowls.
What You’ll Need
- 4 large potatoes
- 1 tablespoon olive oil
- 1 teaspoon garlic granules
- 1 teaspoon dried mixed herbs
- 1/2 teaspoon salt
Step-by-Step Method
- Wash potatoes thoroughly and pat them completely dry.’}, Tip: Use a clean kitchen towel or paper towels, moisture is the enemy of crispness, and dry skins brown better.
- Slice potatoes to about 1/8th of an inch thick, aiming for uniformity.’}, Tip: A mandoline makes this consistent and fast, but if using a knife, steady your hand and keep slices even to ensure even cooking.
- Transfer sliced potatoes to a large mixing bowl. Drizzle with olive oil, then sprinkle with garlic granules, dried mixed herbs, and salt.’}, Tip: Toss in two batches if your bowl is crowded, and don’t be shy with the oil, a light sheen is needed for browning.
- Gently toss the potato slices with your hands to ensure every piece is evenly coated with oil and seasonings.’}, Tip: Use your hands, they’re the best tool to separate slices and feel for even coating, avoid mashing the slices.
- Preheat oven to 400°F (200°C). Line a large baking sheet with parchment paper and arrange the seasoned potato slices in a single layer, ensuring they do not overlap.’}, Tip: Give each slice breathing room, overlap equals steaming, and for crisper results use two baking sheets rather than crowding one.
- Bake for 25-35 minutes, flipping the slices halfway through. Cook until fork-tender in the center and golden brown and crisp around the edges.’}, Tip: Flip gently with a thin spatula, and if the center still feels soft after browning, lower the temp to 375°F, keeping them in a tad longer, this prevents over-browning the edges.
- Remove from oven and let cool on the baking sheet for a few minutes before serving to allow crispiness to set.’}, Tip: Resist the urge to plate immediately, a short rest firms the texture and improves bite.
Nutrition Breakdown
- Serving size: about 1 cup of sliced potatoes, roughly 150 grams.
- Calories: approximately 180 per serving, depending on potato size and oil used.
- Protein: around 3 grams per serving.
- Carbohydrates: about 35 grams, mostly starch from the potatoes.
- Fat: roughly 5 grams, from the olive oil.
- Fiber: close to 3 grams, depending on whether you peel the potatoes or not.
- Short health insight: These are a moderate-carb side with low fat, and using olive oil plus minimal salt keeps them family-friendly, while leaving skins on preserves fiber and nutrients.
Perfect Pairings
- Roast chicken or pan-seared fish, for a classic protein-plus-potato plate.
- A crisp green salad with lemon vinaigrette, to balance the richness with brightness.
- Yogurt-dill dip or a simple garlic aioli, for dipping that introduces creaminess and acid.
- Weekend brunch, served alongside scrambled eggs and sautéed greens for a heartier spread.
How to Store It Right
- Fridge: Cool completely, transfer to an airtight container, and refrigerate up to 3 days. Re-crisp in the oven or air fryer before serving.
- Freezer: Freeze on a tray until solid, then move to a freezer bag for up to 1 month, though texture will be best within two weeks. Reheat from frozen in a hot oven rather than microwaving.
- Optimal reheating: Preheat oven to 425°F, spread on a baking sheet, and bake 8–12 minutes until hot and re-crisped, flipping halfway through.
- Freshness tip: Store with a paper towel layer in the container to absorb extra moisture and preserve crispness.
Expert Tips
- Salt at two points, lightly before baking and if needed after baking, this layers flavor without drawing out too much moisture early on.
- Slice thickness matters, stick to about 1/8 inch, thinner will crisp faster but risks burning, thicker will take longer and stay soft inside.
- Use a high oven temperature and good conduction, like a heavy baking sheet or a preheated pizza stone, to get the Maillard reaction happening quickly.
- If you want ultra-crisp edges, finish under the broiler for 1–2 minutes, watching closely to avoid burning, this adds blistered spots and concentrated flavor.
Flavor Experiments
- Seasonal (Autumn): Toss slices with a pinch of smoked paprika and a teaspoon of maple syrup before baking, finish with chopped parsley and a sprinkle of flaked sea salt for cozy, slightly sweet notes.
- Gourmet: After baking, drizzle with a little white truffle oil and grate fresh Parmesan over the top, serve immediately for an indulgent, restaurant-style finish.
- Playful: Add chili-lime flavor by mixing chili powder and lime zest into the seasoning, serve with a lime-yogurt dip for a lively snack or side.
Mistakes to Avoid
- Crowding the pan, fix: Use two sheets or bake in batches, crowded slices steam and won’t crisp.
- Slicing unevenly, fix: Use a mandoline or steady knife work, consistent thickness ensures even cooking.
- Over-oiling, fix: Aim for a light sheen, too much oil leads to limp, greasy slices, not crisp ones.
- Skipping the rest, fix: Let them cool on the baking sheet for a few minutes, that pause firms the texture and keeps them crisp when plated.
What to Do with Leftovers
- Breakfast hash: Chop leftover slices, sauté with onion and bell pepper, add a fried egg on top for a speedy morning meal.
- Crispy salad topper: Cut into strips and use as a crunchy element in grain bowls or hearty salads in place of croutons.
- Potato nachos: Layer slices on a sheet, sprinkle cheese, black beans, jalapeños, and broil briefly for a fun shareable snack.
Quick Questions, Straight Answers
Q: How thin should I slice the potatoes for maximum crispness?
A: Aim for about 1/8 inch thickness, this balances a tender center with crisp edges. Thinner slices crisp faster but can burn, while thicker ones take longer and may remain soft inside, so uniformity matters most.
Q: Can I use sweet potatoes or other varieties with this method?
A: Yes, but adjust time—sweet potatoes have different sugar content and may brown quicker, keep an eye during the last 10 minutes and remove when golden and tender to avoid overcooking.
Q: Are these suitable for meal prep, and how long do they keep?
A: They’re great for meal prep, store in the fridge up to three days in an airtight container. Re-crisp in the oven or air fryer before serving to revive texture.
Q: What’s the best way to make them extra crispy without more oil?
A: Dry the slices thoroughly, use high heat on a well-heated baking surface, avoid overlap, and give them a brief broil at the end while watching closely.